Supplies you will need:
Crib sheet that coordinates with bedding
Unfinished drawer pulls
Paint or stain
Mod Podge
Scissors
Paint pens
Begin by cutting along the seams and elastic of your sheet so you have a flat surface to work with. Then, iron your sheet.
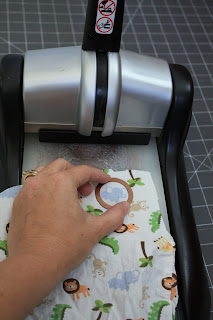
Measure the top of your drawer pulls and cut circles out of your fabric accordingly. I used my Nestabilities and die cutter, but you can use a stencil or whatever works to cut out your circle.

 Paint your drawer pulls and let them dry completely before using the Modge Podge on them.
Add a coat of Mod Podge to your drawer pulls and lay down your fabric circle. I use my finger to smooth it down. Then, add another coat of Mod Podge over the top and let it dry.

 When the first coat is dry, use a paint pen to add dots or embellishments to your drawer pull.
Let the paint dry for a few minutes. Then, add one or more coats of Mod Podge until you are happy with the finish. I ended up with about 3 coats. I also added an initial to one of the drawer pulls by Mod Podge on a Z that I cut using my die cutter.


10 sweet sentiments:
thanks for the tutorial!! i was fixing to do this for my daughters room. i used wall paper for my daughter's old room and it just didn't adhere right, can't wait to try this! thanks!
Awesome! I would love to see pictures when you are done.
Wow. those are WAY cuter than I pictured them! I like the drawer pulls best--very fun!
I especially love the custom drawer pulls.
That was awesome!!!! The drawer pulls are adorable. WOW!!!! I can't believe that was your first how-to, it was excellent.
Following you back -
I love these sososososososo much! You are crazy in the creativity department ;)
Totally cute!
Thanks for linking up to the Iron Crafter!!
What a fun idea! LOVE IT!
Jennie @ Cinnaberry Suite
How cute is that, what a great project!
-Jocelyn
http://beinglds.blogspot.com
I love how these add a customized touch to a piece of furniture! Those little details pull a room together! Great idea!
Post a Comment